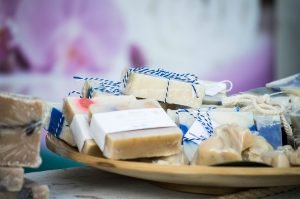
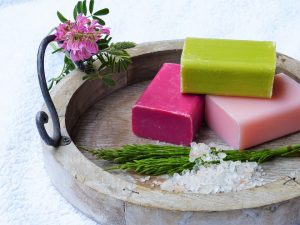
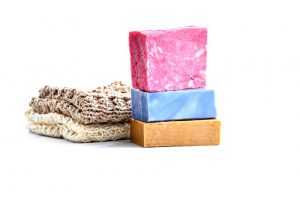
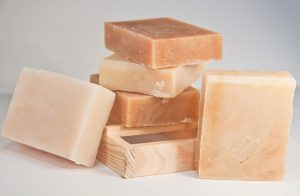
 Manufacture of soap at home has recently become very popular. This is understandable, the process of creating soap with your own hands is so interesting, fun and exciting that it quickly drags out and turns into a hobby. Half an hour of time and visible result of labor, and the color, shape and smell of soap depends, only on your imagination and desire.
You can use it for yourself or give as a nice present to someone. Want to make it on your own? Then, find out how to do this the right way. In this article, we will have a look at the process of making a natural soap, which has many advantages compared to the standard soap that you can buy. Use this guide to making a high-quality soap you can use for many purposes.
Contents
-
- Step number 1: Find out what homemade soap consists of
- Step number 2: Prepare all necessary ingredients
- Step number 3: Learn the basics of soapmaking process
- Step number 4: Check which ways of making soap exist + choose the recipe you like
- Recipe number 1: Lanolin soap for children
- Recipe number 2: The classic Castilian soap
- Recipe number 3: Silk soap with jojoba oil
- Video
Step number 1: Find out what homemade soap consists of
 People distinguish two types of soap: soap “from scratch” and soap from the base. Most often, handmade soap is the one made of a soap base – a ready-to-use soap that is melted with variations of color, smell and additives. Soap “from scratch”, as its name suggests, is made from vegetable oils and animal fats of food quality by traditional soap making technology. This method is slightly different from industrial – it is slightly simplified in order to maximize the beneficial properties of oils and additives in the soap. Many ethnic types of soap, which tourists bring from travel, are made in the same way – Castilian, Aleppo, Marseilles. What is a zero soap made of?
In short – oils and alkali. The saponification reaction has been known for thousands of years – the alkaline solution saponifies the fat (vegetable and / or animal) and produces salts of fatty acids known to us as soap. Natural soap from oils without alkali in principle cannot be obtained. Soap, obtained without its participation – not a soap, but a syndet, that is, a cleanser made from modern surfactants.
Oils and animal fats in the noodle are of food quality. Each oil differs in its properties, which it imparts to soap – hardness, foaming (even so – one oil gives large bubbles in the foam and the other – small ones), cleansing ability, softening, care, treatment.
Additives in the soap are very different and serve many purposes:
- aromatization,
- coloring,
- improving penness,
- conditioning,
- softening,
- treatment,
- exfoliation,
- care, etc.
Is it safe? After all, there is alkali! Don’t worry, it is safe. In the finished soap, there is no alkali. All alkali reacts with oil and turns into soap. Home soap technology is based on an accurate calculation of the soap recipe – the oils are carefully weighed, and the necessary amount of alkaline solution is calculated for their weight.
Important: If the skin is oily, you can use any cosmetic or toilet soap. And, if on a fat skin there is acne, then it is better to choose a sulsen soap for washing.
Step number 2: Prepare all necessary ingredients
 You will need the following ingredients:
- Soap base. You can find the ready-made soap base, which is sold in specialized stores, or buy a baby soap. If you want your soap to turn out to be transparent, then choose a transparent soap base, if matte, then choose the matte base accordingly. It costs not very expensive per kg. If you decide to get a baby soap, then, buying it, choose an option without a smell: baby soap smells very strong and specific, and this smell is not easy to remove.
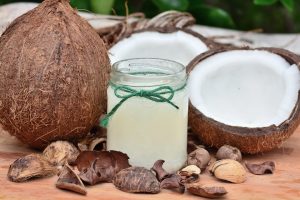
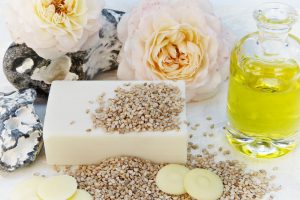
- It is sold in pharmacies and costs literally a penny. This is the base oil of the future soap. You can choose almond, apricot, peach or olive.
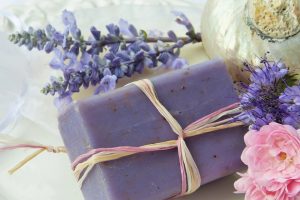
- Essential oils. You can take, for example, lavender, it removes the headache, soothes and helps with insomnia. Or jasmine, it enhances the mood, or the tea tree – a very strong antiseptic. In general, choose any oil that you like.
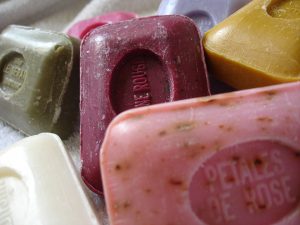
- Decide what color your soap will be, and then choose the dyes. To make the soap red, you can take red pepper, sandalwood red powder. To make it green – you can use dry grass. If you want to make orange soap, then add turmeric, if brown – chocolate, cinnamon and coffee. You can also add oat flakes, finely chopped walnut shells, honey or propolis tincture, cream, milk or cream, small pieces of another soap, dried flowers, such as marigolds or roses, zest, ground coffee or coffee beans. There are professional dyes, which can also be bought at a specialized store. Their colors are more diverse and brighter than those of natural colors.
- Sugar (for better soap melting).
- Dishes for a water bath, where you will dissolve the soap base.
- Forms for the future of soap. It is better to use ceramic or plastic, for example, children’s sandboxes. But if there is an opportunity to buy ready-made specialized forms, it will be very good.
- Warm water or milk to dilute the soap mass (it is better to use milk).
- Alcohol or other strong alcohol for spraying the surface of soap. Pulverizer for application.
Step number 3: Learn the basics of soapmaking process
 The soap base should be cut into small pieces so that it fuses faster. If you have a baby soap, then it must be grated or grinded in a blender.
- You should put this mass on a steam bath, close it and start melting it, remembering to stir it occasionally.
- Add the preheated base oil. When the soap melts, you need to pour water into the mass from time to time, but better – milk or cream. From water, the mass can foam and get liquid, and with milk it will melt to the desired sour creamy, acidic consistency.
- In addition, if you overdo it with water, then during cooling your soap will separate. Therefore, do not be greedy, adding milk instead of water. Some experts generally advise not to add liquid, and replace it with sugar, explaining this by the fact that the mass on the steam bath melts better and faster.
- When the mass is ready, you need to add essential oils and dyes. If you use store colors, then add literally 1-2 drops per 100 grams of soap base.
- Then stir and get the color you want. And you can add special flavors for soap, they are also sold in all specialized stores. Now. you can go to the bottling molds.
- If the surface of the mass starts bubbling, then you need to spray it with alcohol. After this, the mold should be placed for complete cooling.
- Admire the soap cooked with your own hands and show off the result!
 The soap base should be cut into small pieces so that it fuses faster. If you have a baby soap, then it must be grated or grinded in a blender.
Important: In the preparation of a homemade soap, it is very important to maintain the proportions. To a piece of soap weighing 100 g, you need to add 3 teaspoons of base oil, 1 teaspoon of glycerin, 3-5 drops of essential oils.
Step number 4: Check which ways of making soap exist + choose the recipe you like
 There are two classic ways of cooking soap: hot and cold way of soap making.
- Cold method: In the cold method of soap making, two solutions are made: hot oil and alkaline, then the oils are mixed with an alkaline solution at a temperature of 40-60 ° C and the mass is brought to the “trace” by intensive mixing (manually it can take about an hour or more, using a blender “Trace” can be achieved in 5 minutes). The “trace” is the state of the soap mass, in which fats and alkali do not separate, but are brought to a homogeneous, dense mass, with the stirring of which remains a subtle (thin trace) or highly visible (dense trace) in the soap. When the alkali is combined with the oils, a chemical reaction called saponification begins, the heat is released and the soap becomes very warm, if not hot, and the soap begins to go into the gel phase (the color changes and the consistency becomes waxy, slightly transparent).
- Hot method: It has historical roots and has been used by our ancestors long ago, which cooked soap from wood ash, animal and vegetable fats and water. In 1811, the French chemist Michel-Eugene Shevrel calculated the exact amount of fat needed to obtain soap and explained the process of saponification. Prior to its discovery, soap was cooked on the eye for several days, then salted and brought to a solid state. Today, we know the exact formula of soap making, calculated saponification numbers for oils, and there are convenient soap calculators for calculating alkali accurately.
How to choose the right method for you?
The cold method will suit those who appreciate the beauty more than functionality. A hot way is good for those who do not know how to wait so long before the maturation of soap, and who is ready to spend more time now and for this. A hot way for those who appreciate in the soap is more functionality, its properties. Cold-hot way – this is a good compromise for those who want a beautiful soap for the shortest maturity. It does not matter what kind of soap making you choose – cold or hot or a combination of them, soap takes time to dry and harden. The important thing is not that soap is primarily a product for cleaning our skin, not moisturizing and softening, and no matter what wonderful and expensive oils you put, there is not much left of them.
Recipe number 1: Lanolin soap for children
 Children’s skin is tender and most susceptible to various injuries, while lanolin perfectly nourishes and has a healing effect. Lanolin is a wax of animal origin, which is obtained after cleaning sheep’s wool.
To make baby soap from scratch in the hot way you will need:
- Refined palm oil – 80 gr
- Palm oil – 120 gr
- Refined Shea butter – 50 gr
- Refined Castor Oil – 50 gr
- Olive oil – 100 gr
- Lanolin – 30 gr
- Alkaline sodium – 57 gr
- Chamomile broth – 140 g
Step-by-step recipe for cooking soap for children from scratch hot way:
- Soap will be cooked on chamomile broth, for which 3 tablespoons of chamomile should be poured with 300 ml of boiling water and let it brew for about 2 hours.
- Strain the prepared broth through gauze or a strainer and cool to the refrigerator.
- Mix all the oils in one container and melt them in a water bath, bringing them to a homogeneous consistency. Then, cool the oil to 40 degrees.
- Measure out the necessary amount of alkali and in small portions gently pour into the cooled solution, constantly mixing.
- Cool the alkaline solution to 35-40 degrees Celsius. Oils and alkali should be mixed at the same temperature.
- Pour in the oils an alkaline solution with chamomile broth carefully through the strainer, that would not dissolve the crystals did not get into your soap.
- Then, use a blender to mix the ingredients until the trace appears. Then the soap mass must be put on a water bath, and the water in the tank outside should reach the level of oils inside.
- Keep your soap in a water bath for 30-40 minutes, leading up to the gel stage. When your soap becomes completely translucent, a uniform color and consistency.
- After reaching the gel stage, add lanolin, mix the mass thoroughly.
- Put the soap in a mold and leave in a dark cool place until it is completely solidified.
- Your soap will be ready in 2-3 days. Then you can get it, cut it into pieces and use it.
Recipe number 2: The classic Castilian soap
 Ingredients:
- 200 g – olive oil
- 2 g of ice water (ice)
- 7 g – alkali NaOH
Free the workspace from unnecessary objects, open the window for airing, prepare all the necessary devices and ingredients, put on gloves, close our face with a respirator, goggle our eyes and close the door from strangers. In advance, the frozen water is weighed in the required glass by volume.
Weigh alkali. Prepare an alkaline solution, for this, with the most careful movements, we inject alkali into the ice. A chemical reaction will begin with the release of heat. Therefore, at the time we leave the alkaline solution, so that it cools down a little. Measure out the olive oil and pour it into a dish.
When the temperature of the alkaline solution differs from the olive oil temperature only within 100C (we measure it with a thermometer), introduce the solution, filtering through a sieve into the oil (not vice versa). We first mix the alkaline solution with a spoon, and then connect the mixer.
Beat the mass until the appearance of a track following the mixer – this is called a steady trace. After a minute, check again for a trace. In view of the large amount of olive oil, the mass may become exfoliated again, do not panic, you just need to add it, and again check for a trace.
The Castilian soap brought to the trail is sent to the water bath under the lid, to accelerate the passage of the gel stage, and therefore to accelerate the maturation process. Periodically, open the lid and carefully mix the soap mass, if necessary pouring a little water. In the process, it is necessary to check whether all the alkali is gone and whether the soap is not plucked. Some professionals check the soap on the tongue, if it’s pinched, then cook it.
You can check the pH meter or strips of litmus paper, pH 8. After a few hours, we get the gel stage, we remove the soap from the water bath. Place the Castilian soap made in a hot way to the molds and tap it well on all sides. Leave the soap freeze in shape from a few hours to a day. Remove the dried soap from the mold and, if necessary, cut it into smaller pieces. You can use it immediately after hardening. However, with time such soap becomes only more noble. In the absence of dyes and perfumes, soap is completely hypoallergenic.
Recipe number 3: Silk soap with jojoba oil
 Ingredients:
- Alkali NaOH – sodium hydroxide – 248 g;
- Distilled water, can be frozen – 580 g;
- Silk threads cut – 2-3 tablespoons. (until 3 %);
- Composition of oils: Coconut – 550 g; Olive oil – 460 g; Olive oil can be partially (50/50) or completely replaced with Rapeseed, which will give the soap additional silkiness.
- Palm – 360 g;
- Sunflower – 360 g;
- Jojoba – 120 g.
- Essential oils by choice, it all depends on the properties – from 0.5 to 10%;
- Pigments (dyes) – if you wish.
Pour out the measured amount of alkali in the ice water. In a heated (due to alkaline reaction) solution, add pre-crushed pieces of silk uncolored yarn. The more shredded the silk was, the faster it will dissolve. As a result of hydrolysis, the solid fibers of silk are split into useful amino acids and proteins. Enter only natural non-colored silk threads (fibers), or natural cocoons without silkworm, moisten silk in water before use.
In a quiet fire, sink coconut and palm oil, then pour Olive, Palm and Sunflower liquid oils. Combine the oils with the alkaline solution with silk that has cooled down, and beat it with a spoon or a mixer until the trail is obtained, pouring in the reixture – jojoba oil. If there is an idea to flavor and color soap from scratch in a hot way, then it’s time to add flavor and color. And, you can paint as a whole mass in one color, and in different tones, dividing the soap mass into different capacities. Prepare the form, cover it with parchment, shift the prepared soap base into a shape, alternating colors, if the soap has been painted in several colors without isolating.
Important: Leave the soap until it is completely frozen, within 24 hours.
Back
Video
Related Posts
- Top-10 Great Recipes of Delicious Homemade Candies
- How to refresh your old furniture using homemade furniture polish
- Homemade fabric softener: easy recipes that will not take your money and time and will save your family’s health
- How to Do Beautiful Permanent Makeup in 4 Steps?
- Homemade carpet cleaner – the best non-chemical recipes for your family’s safety
- Seven natural homemade teeth whitening remedies